Awards


is that you kishi?
Okay, so previously, I got some positive feedback on my manga artwork, so I decided to show you how I go about doing it ^_^ Enjoy!looks just like the manga....
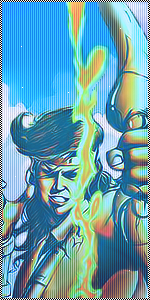
Step 1: Choose you reference material
You must be registered for see images
I have decided to choose the bottom left-hand panel to reproduce. I will need to do some work on it, like finishing the head as it is left out!
Step 2: Line Art
You must be registered for see images
As you can see above, the first stage is to simply produce a quick rough sketch of the image you would like to draw! Don't use anything darker than a HB!
As you can see I have done two things:
- Extended Sasuke's hair, as this is not present in the panel
- Produced a very light sketch, so marks are easy to rub out if there are any mistakes.
You must be registered for see images
One you're happy with that, then go over the entire sketch and produce a more refined line art, so that your marker is blocked in more accurately. Again, don't use anything darker than a HB as this will simply prevent you from erasing any errors.
You must be registered for see images
Finally for this stage, it would help to draw in your pen marks which you will go over later, since this will improve your accuracy, since pencil marks can be easily rubbed out.
Step 3: Using you marker to block in
You must be registered for see images
The first thing you want to do is to choose you marker. Alcohol-based (permanent) or non-alcoholic. As you can see above, the permanent (on the left) is much darker and gives a richer quality and finish, however, these markers are more expensive.
You must be registered for see images
Once you have chosen, begin to block in large areas, such as the hair. Make sure you do this slowly and carefully! Patience is a virtue!
You must be registered for see images
I just wanted to point out, a great tip from me would be to leave white gaps where there are folds in the clothing! It makes the picture look more authentic!
Step 4: Outlines
You must be registered for see images
Finally, to define the image further, take the same marker you used, and go over the thicker outlines of the image, this excludes the shadows. Make sure you produce a result below. Remember, to be extremely careful as mistakes can't be removed or changed.
You must be registered for see images
Okay! Once you've done that, you should be left with the shadow areas. Grab any black pen and go over your pencil markings you made earlier carefully! It is important to use a pen as these produce rich, thin lines which will help you to produce the result above!
Step 5: The Sharingan (Optional, but not for this art of course)
You must be registered for see images
Okay! This is the fun part of course. The sharingan is made up of simple shapes, so use a HB pencil to draw a light drawing so that you can easily rub out any errors!
You must be registered for see images
Okay, the most stupid thing you could do at this stage is to use a marker to block in the eye. NO. Use a pen instead as this is easier to block in smaller areas! As you can see above, you can produce a more detailed finish!
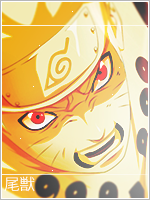
Finished Product:
You must be registered for see images
Once your done, you should have something looking like this! To see how it's done, open the tabs above xd
If you found this particularly useful, don't hesitate to say so! ^_^
Last edited by a moderator: